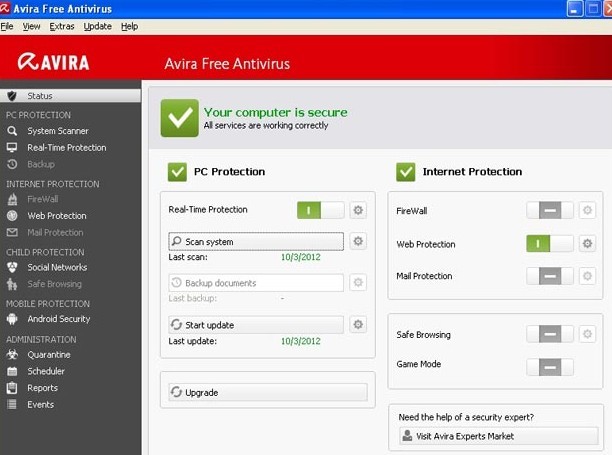
Avira Antivirus is a program to help detect and delete virus timely so as to protect computers from being compromised. Apart from virus scanning, Avira Antivirus also protects you when you are shopping online, surfing the Internet, using smart phone equipped with Android and from potential dangers stemming from social networks.
Anti-virus program is always needed on a computer to decrease the possibility of being under attack by infections. Therefore, it is not recommended to uninstall Avira Antivirus if one doesn’t have another anti-virus program at the moment, unless troubles are coming out one after another because of the conflict among several anti-virus programs, the trial session is expired and you don’t want to purchase the licensed version, you prefer another brand of anti-virus program, etc..
One thing to which you may pay your attention is that some security registry key of Avira Antivirus as well as log/report can remain behind after its uninstall, which may cause slowness in overall PC performance, unstable network connection, error message popup issue when attempts are made to install and uninstall programs, especially those help remove virus. Therefore, it is recommended to uninstall Avira Antivirus manually and find out any folder and file named after Avira.

Method One. Uninstall Avira Antivirus by its Avira removal tool.
Step 1. You can uninstall Avira Antivirus by going to its website offering its removal tools
Step 2. Hit on the down-headed arrow in green background next to the option you want to download.
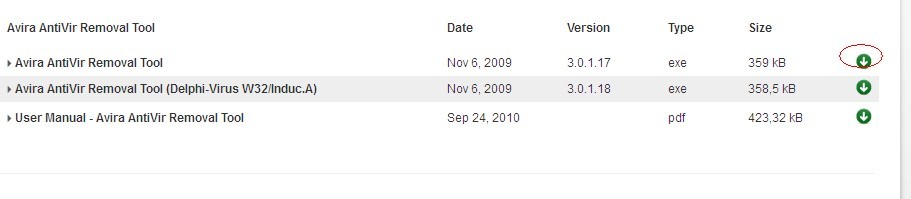
Step 3. Hold Ctrl and J key on the keyboard together to bring up a download list.
Step 4. Right click on the Avira removal tool to select ‘open containing folder’.
Step 5. You will be directed to its software and please double click on it to run the removal tool.
Method Two. Uninstall Avira Antivirus with its own widget.
Step 1. Right click on the Avira Antivirus icon.
Step 2. Select ‘Properties’.
Step 3. Under the ‘Shortcut’ tab, select ‘Open File Location’.
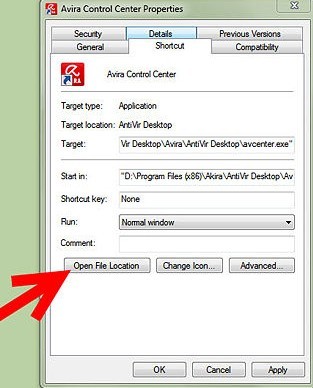
Step 4. Tick ‘Remove’ and hit ‘Next’.
Step 5. Choose ‘Yes’ to allow Avira Antivirus uninstall itself automatically.
Method Three. Uninstall Avira Antivirus in Windows Add or Remove Programs.
Step 1. Hit Start menu and select Control Panel. (If you run Windows 8, please move your mouse to bottom-right corner of your desktop, then choose Control Panel in the pop-up sidebar)
Step 2. Select Programs or Add/ Remove Programs/Programs and Features (for Windows 8).
Step 3. Choose Avira Antivirus.
Step 4. Hit the ‘Uninstall’ button on the top of the list or right click on the selected to tap ‘Uninstall’.
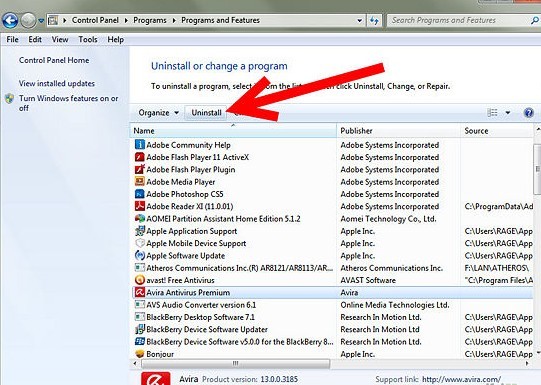
Step 5. Follow the uninstall wizard to uninstall Avira Antivirus.
Method Four. Uninstall Avira Antivirus by re-managing database.
– Windows 8
Move your mouse over lower right screen -> charms bar appears -> click Search charm -> type ‘regedit’/‘regedit.exe’ -> hit Enter key -> hold Ctrl and F key together to bring up ‘find’ box -> type keys there and hit Find button to remove them.

– Windows 7/Vista/XP
Start menu -> locate Run/ Search box -> type ‘regedit’ -> hit Enter key -> hold Ctrl and F key together to bring up ‘find’ box -> type keys there and hit Find button to remove them:
“HKEY_CURRENT_USER\Software\Microsoft\Windows\CurrentVersion\Explorer\MenuOrder\Start Menu\Programs\Avira\ Avira Antivirus”
Notes:
Some reported that uninstalling Avira Antivirus was hard because error message would come up during the uninstall session. If it is the case, it is advisable for you to uninstall Avira Antivirus with all the methods offered above, starting from the first method to the last. Do not forget to exit before you uninstall Avira Antivirus.