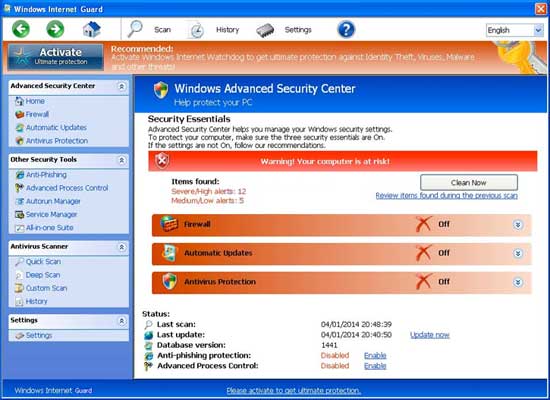
No doubt that Windows Internet Guard is another fake anti-virus program that copies the interface from a genuine Windows anti-virus program. There are about 20 FakeVimes coming along one after another. They share the same interface except the name. Here’s the list of some notorious FakeVimes rogueware:
Many people become confused when being bombarded with so many Windows anti-virus programs nowadays. It is quite a tough task to differentiate the genuine from the fake. VilmaTech Online Support herein offers a list of symptoms incurred by Windows Internet Guard rogueware. Should you have any questions or run into difficulty when trying to remove Windows Internet Guard due to some unexpected scenarios that are not listed down here, please do feel free to get answers and exclusive help according to your concrete situation by contacting senior technicians here.

Under the cover of the mechanical mess, Windows Internet Guard targets money. There are four ways for the fake anti-virus program to gain easy money for its author:
NO.1 – cheat victims into purchasing licensed version/ advanced version or whatever it is without helping victims to cleaning computer.
NO.2 – collect system configuration and resell such information to spammers who thirst for fast spread of his/her own products by finding out and attack the common vulnerability.
NO.3 – record input information and resell such information to cyber criminals who could execute money laundry with victims’ accounts or empty out accounts directly.
NO.4 – bring in additional applications of its cooperators through the vulnerability as a result of its random modification for commission.
The registration web page is temporarily built to make Windows Internet Guard to work just like the genuine anti-virus programs. It can be thus inferred that the page is not strictly built. As a consequence, bug can be easily found and exploited by infections injected onto the Internet. Besides, backdoor program has been detected to be attached to the fake anti-virus program so that its remote author could gain access to the collected information and implement improvements to make sure that Windows Internet Guard would keep staying on a target machine. Once such backdoor program is captured, it will be utilized as a passage to transmit vicious code without interference.
What’s worse, Windows Internet Guard numerates and overwrites the drivers concerning security service when it is penetrating into a target machine, which leads to the cease of automatic update and the malfunctions of installed anti-virus program. This is why the fake anti-virus program cannot be removed by security utilities automatically. Below is the manual removal method. You are welcome to follow up. Any help request will be immediately answered if you contact VilmaTech Online Support with the button here.
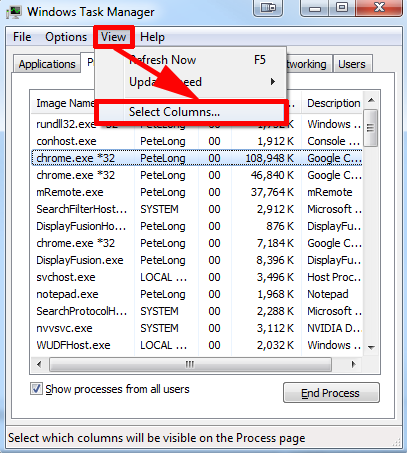
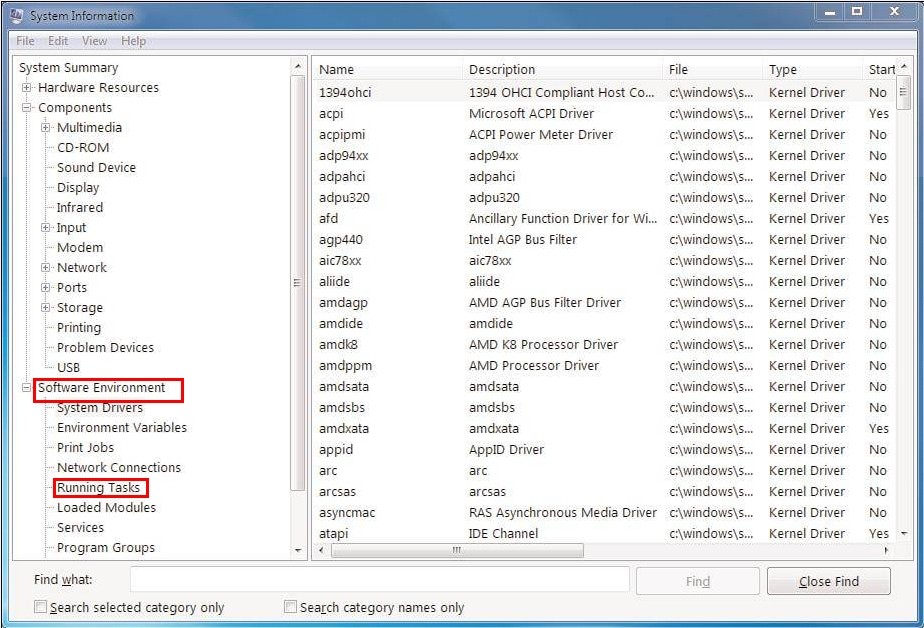
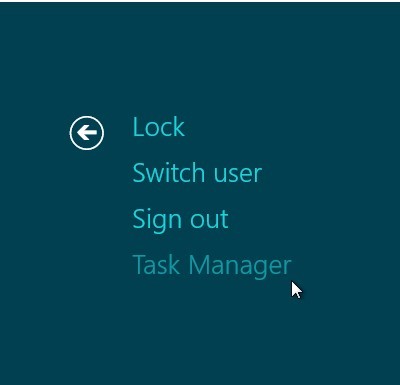
Step1. End Windows Internet Guard’s running processes.
Windows 7/XP/Vista
Windows 8

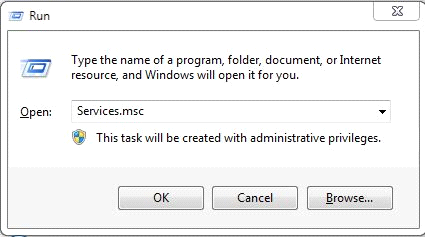
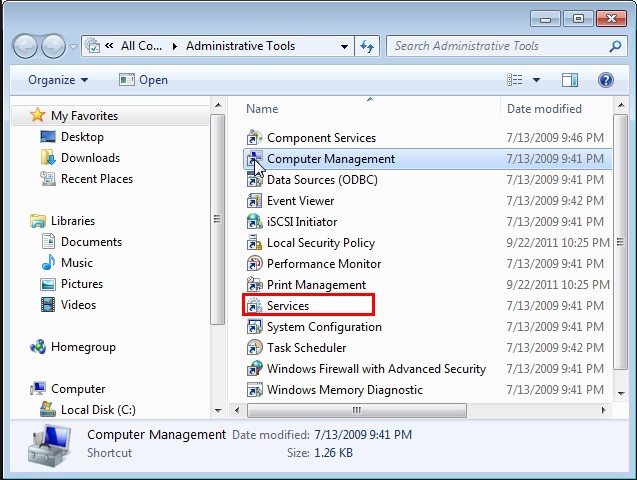
Step2. End Windows Internet Guard’s service.
Windows7/vista/XP
Windows 8
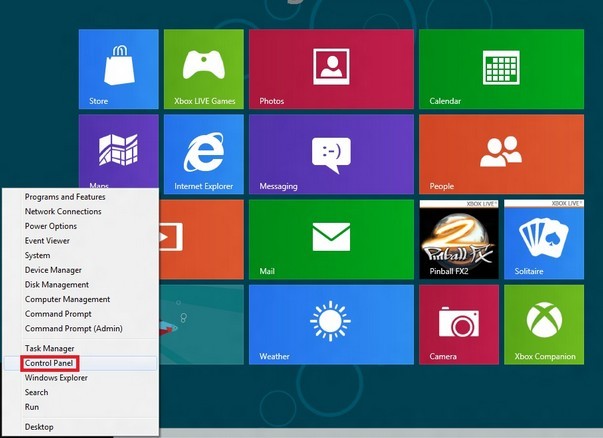
Step3. Uninstall Windows Internet Guard from Control Panel.
Windows 7/Vista/XP
Windows 8
Step4. Access Database to remove the items generated by Windows Internet Guard.
HKEY_LOCAL_MACHINE\SOFTWARE\Microsoft\Windows\Current Version\Run\random.exe”
HKEY_LOCAL_MACHINE\Software\ Smart Guard Protection
HKEY_CURRENT_USERSoftwareMicrosoftWindowsCurrentVersionRun
HKEY_CURRENT_USER\AppEvents\Schemes\Apps\Explorer\Navigating
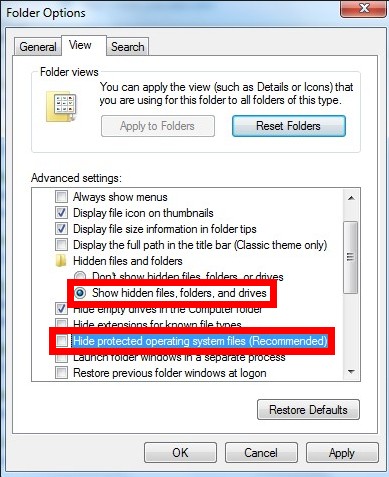
Step5. Show hidden items to remove the items produced by Windows Internet Guard from local disk.
Windows 7/XP/Vista
Windows 8
Navigate to C:\Windows, C:\Windows\System32, C:\Program Files\Windows Internet Guard, C:\Users\[your username]\Documents\ Windows Internet Guard and C:\Users\AppData\Local\ Windows Internet Guard to remove all the items generated on the day when Windows Internet Guard firstly appeared on the target machine.
Don’t even be naïve to think that reboot computer could drive Windows Internet Guard away or at least stop it from operating. The rogueware has injected its code into startup configuration to guarantee that each Windows start would wake it up and keep on working. Windows Internet Guard is a piece of sticky program that conventional removal is far away from sufficient; more steps are required to be taken deep in the infected system. It should be made clear that delay in its removal could result in additional and extra unexpected issues as security service and programs are disabled not to be powerful enough to ward off infections.
With weak protection, the affected machine is under the radar of various infections. Should it be that additional infiltration takes place, more steps are required to be taken against the additional items before removing Windows Internet Guard completely and thoroughly. Otherwise, vulnerability could be taken advantage by the rogueware for its re-image. One should be informed that the above steps are designed exclusively to Windows Internet Guard instead of incurred issues. Therefore, certain level of virus knowledge and computer skills is necessary. For the removal of additional infections, one could seek solutions accordingly in virus reservoir; or as alternative, get specialized technical help from VilmaTech Online Support.
It is recommended to create a restore point after removing Windows Internet Guard completely so as to, just in case, alleviate virus removal procedures and relief mechanical problems in the future. Here’s the video to show how.