Hi there. I am wondering if you can help me uninstall Reimage Repair. This software was installed a month ago when I was browsing. A popup told me my PC was not secure enough and suggested me download the Reimage Repair for protection. Considering it as a security program, it installed it without hesitation. However, I found I got more alerts since it has been installed. It tells my PC has virus infections and I have to pay to fix the problem. I thought it is free. My other antivirus software which I paid for did not find any threat. I do not know if the infections are real. In fact, I trust my paid antivirus because I have used it for years and it keeps my PC safe for all the time. So I decide to uninstall the software. However, I failed. All I get are errors. I tried it under Control Panel, it said I do not have right to do that. Can you believe that? I am the owner and Admin user of the PC. Anyone here has the same issue? How do you resolve it? Please help me uninstall Reimage Repair.
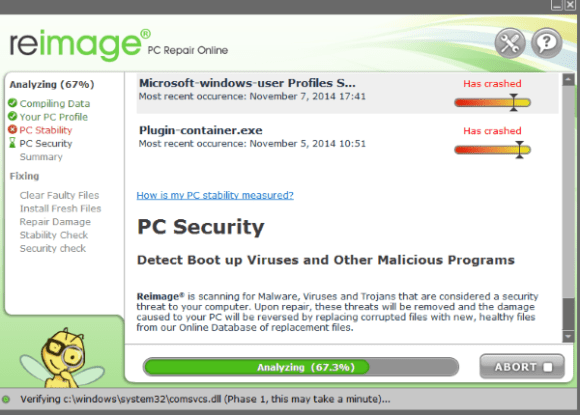
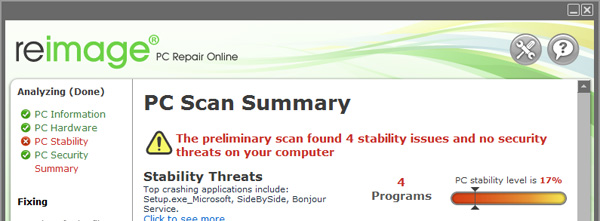
Reimage Repair is advertised as an antivirus scanner and PC optimizer. According to the provider, it helps users optimize and fix Windows system. Many users find it helpful, and keep it as their security program. It offers to scan your PC for issues and threats for free. You will be able to review a detailed scan report about your PC health. According to its users, its full version does help users optimize the PC. It helps users restore Windows and fix bugs. Of course, there are some users who don’t like the software.
Reimage Repair is a legitimate repair utility. Why some users don’t like it? It is very normal that users have different feelings about the same thing. They have different needs. If the software does not work in the way they expect, they don’t feel happy with the service. Some users don’t like the fact that Reimage Repair does not operate as the primary security tool. It is offered a complementary program to another antivirus. It helps you scan for malware and issues for free. If you need help to fix Windows error or damage caused by virus infection, you are required to register and pay the full version. It is reasonable that a service charges for PC solution and other supports. Some users refuse to pay because they already paid for another famous antivirus package. According to the provider, Reimage Repair does not deal with issues with third party software. Some users believe some alerts sent from Reimage Repair are misleading and it overstates the issues. They would rather to trust other famous security software they used before.
Many users installed Reimage Repair to fix Windows issues while some users do not remember they did install the software. Some users searched for help on Windows error online, and Reimage Repair popped up as a security program. They took the ads serious and installed it. Besides, the software can be bundled with third party software and installed on your PC without your notice. It’s okay if you like Reimage. If you don’t like third party software to be installed alongside, you should pay attention to license agreement before you install software downloaded off the Internet. Uncheck the option to stop installing software you don’t need.
Some users have problems when using Reimage Repair. Some of them complained that they constantly saw unavoidable messages about Windows issues. The messages told them to purchase the full version of the program to fix the issues. Users could not find the option to close the popup message. When they used the browser, the message appeared on every page they open. Sometimes, they even were redirected Reimage Repair websites suddenly with recommendation to register the service. Some users reported that they saw misleading scan results. They were told their PC had serious problems with high risk. If they didn’t purchase Reimage Repair license, they would lose everything on their brand new PC. However, their system security detected no threats. Besides, some users found that the program slowed down their PC performance, and it took a long time to respond to their command. To avoid endless popup alerts and have better browsing experience, some users decide to uninstall Reimage Repair. However, they have problems when trying to uninstall Reimage Repair.
According to users, they mainly have three kinds of problems when they are uninstalling Reimage Repair. One, they can’t find Reimage Repair under Control Panel. Two, they get errors and fail to proceed. Three, there are leftovers after they uninstall the software.
Commonly, users can find all software they installed under Control Panel. However, some users can’t find certain programs due to some reasons. You can restart the PC and try it several times. Some users can find Reimage Repair, but they can’t proceed. Different users may see different errors. The error may tell them that the software is corrupted and can’t be uninstalled. Sometimes, it states that users don’t have sufficient permission to access and uninstall the item. Below is one of cases you may have.
After you click Uninstall, you see “An attempt has been made to uninstall Reimage. This may be an admin generated action, but could also be the results (sic.) of a virus or malware attack. Allowing this action will leave your computer unprotected. Do you want to proceed? Click No unless you are performing this action intentionally. Yes No(2)”
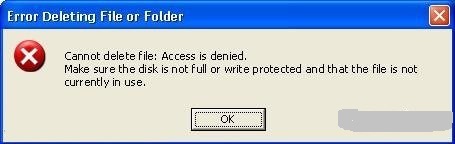
After you click Yes, you see “You do not have sufficient access to uninstall Reimage Repair. Please, contact your system administrator.” You see this error because Reimage Repair is designed to prevent attempts of uninstalling. You may have to change your mind and continue to live with constant popups.
Another problem is that you can’t Reimage Repair completely. After you uninstalled the software manually, its component and part of the registry data left on the system. An incomplete uninstallation of Reimage Repair may cause problems like performance slowdown, system crashes and blue screen etc. Too many useless files also occupy the free space of your hard disk and slow down your PC speed. Therefore, it is important to completely uninstall the software and remove all of its files.

As it is not easy to uninstall Reimage Repair, we decide to provide step-by-step guides to walk you through to uninstall it completely. There are two ways to perform this task. You can choose to remove it manually or use an uninstaller to uninstall it automatically. Now, let’s get started.
Option A: Uninstall Reimage Repair Manually. Windows operating system comes with a specific removing feature which allows users to uninstall the software they installed on the PC. Below is the guide to uninstall software on Windows 10.
Method 1: Uninstall from Start menu.
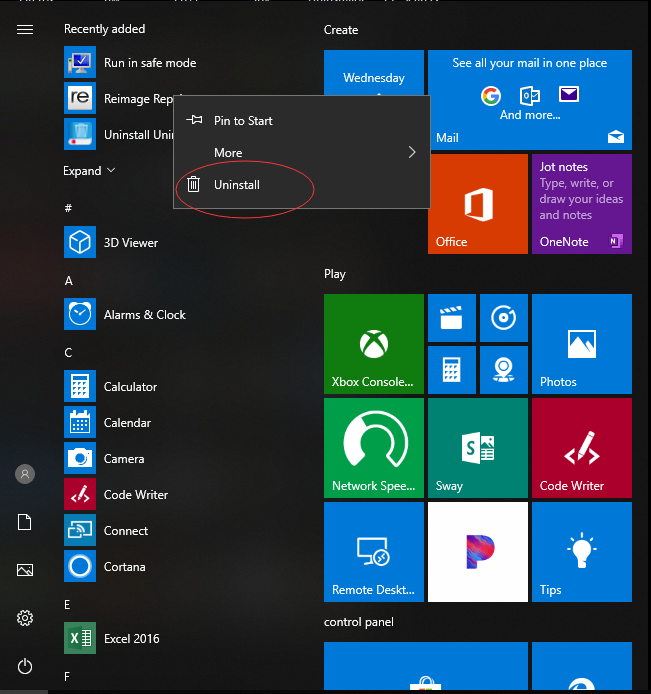
Step 1: Click Start button and look for Reimage Repair from the application list.
Step 2: Right click and uninstall it. Confirm the action.
Method 2: Uninstall from Settings.
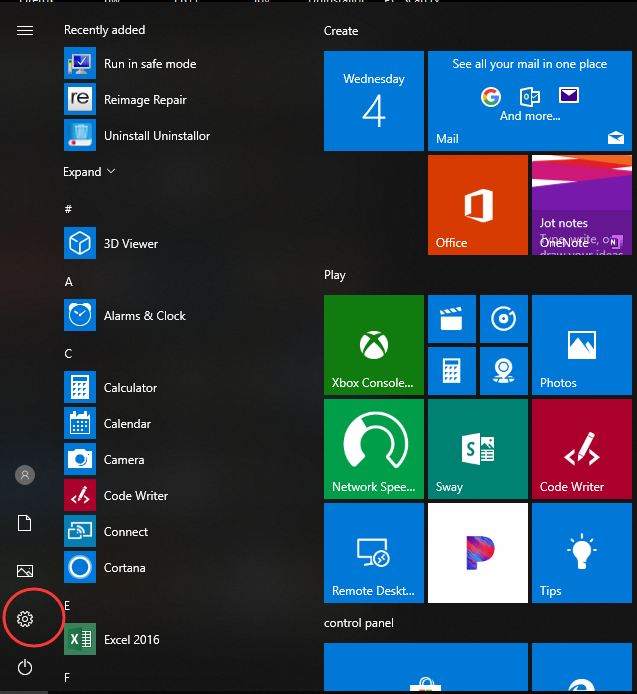
Step 1: Click Start button and open Settings window.
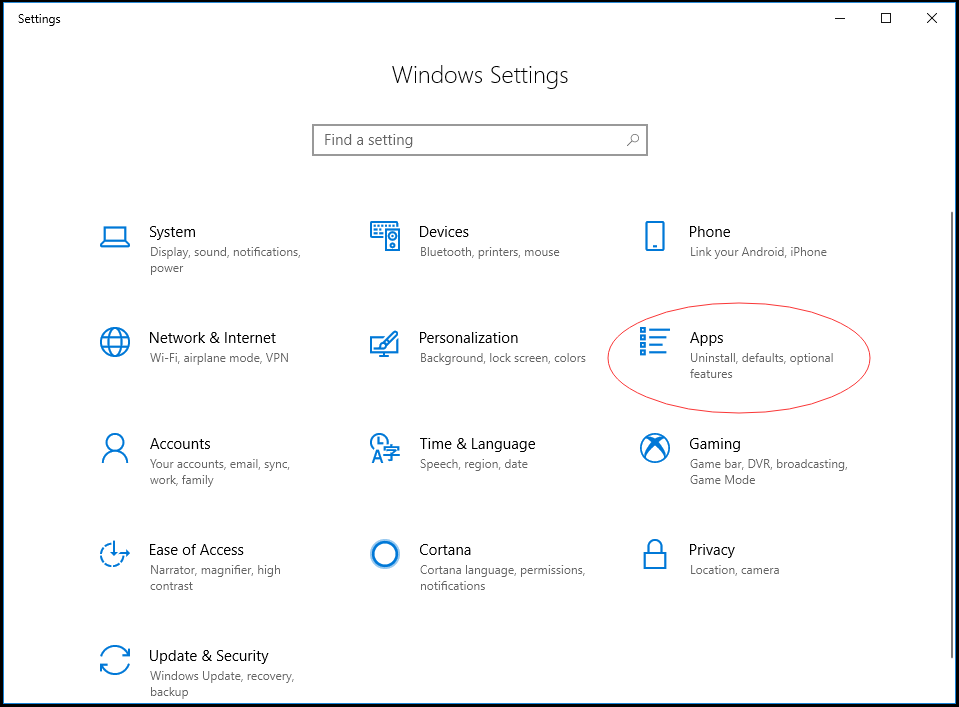
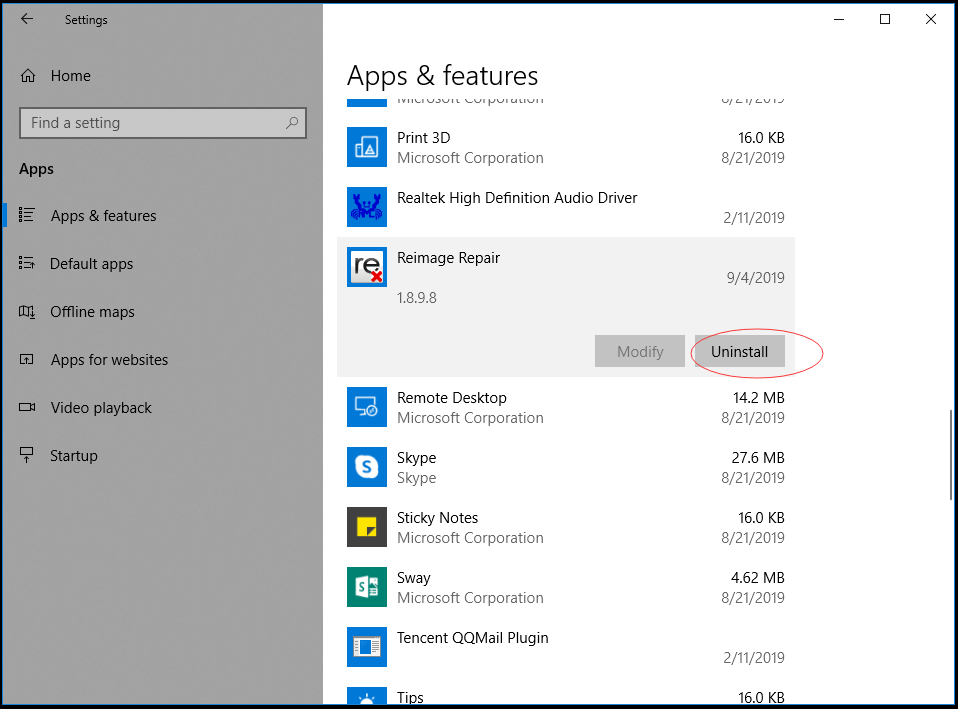
Step 2: Click Apps and select App & features.
Step 3: Locate and click Reimage Repair. Select Uninstall to remove the software from the list.
Method 3: Uninstall from Control Panel.
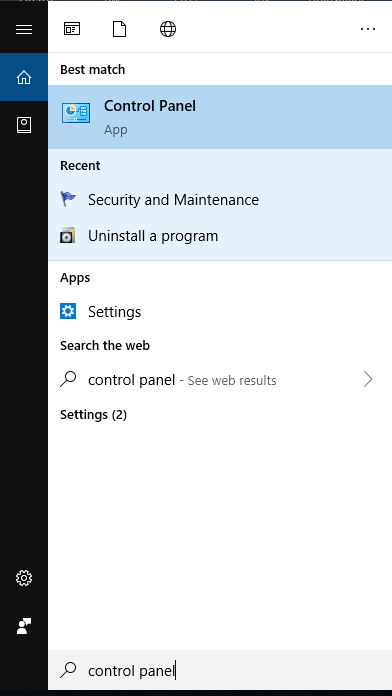
Step 1: Click search box on the taskbar to search for Control Panel. Click and Open it.
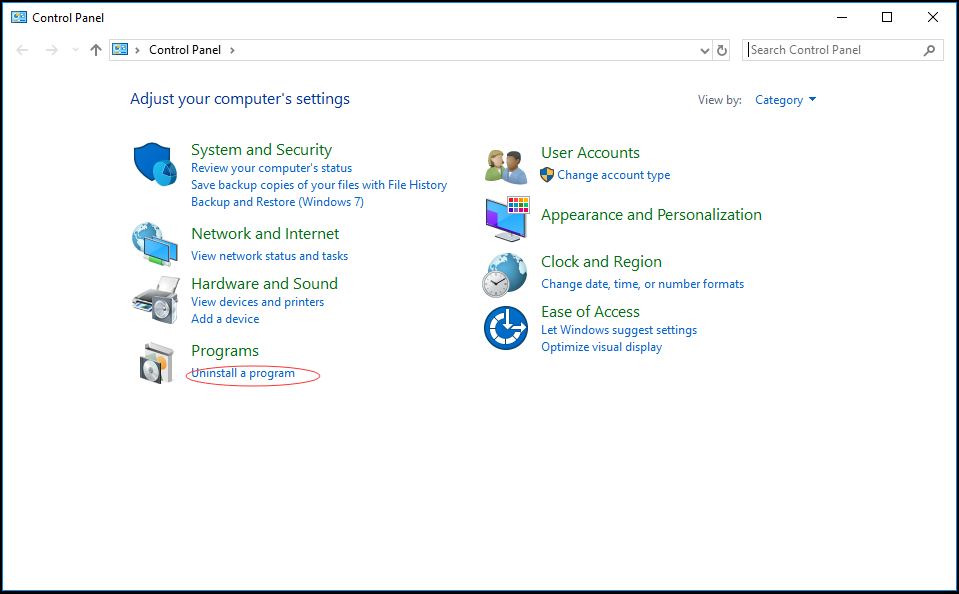
Step 2: You will see Uninstall a program under Program menu from the Control Panel screen.
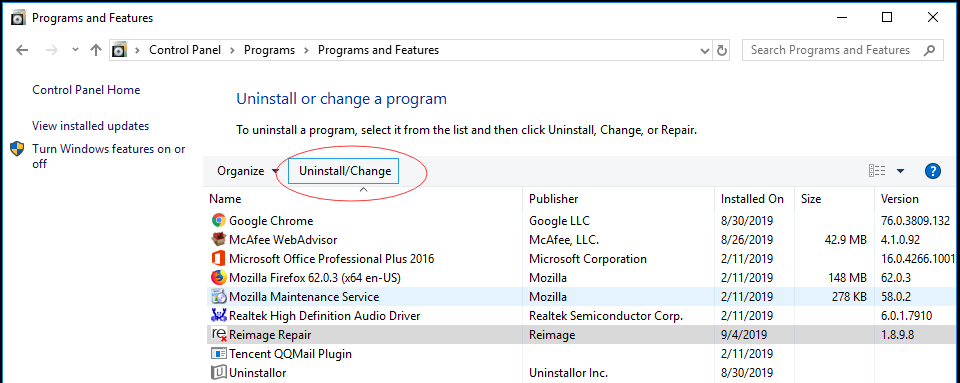
Step 3: Look for Reimage Repair and uninstall it.
After you go through the software manual removal, you need to clean up registry leftovers to uninstall Reimage Repair completely. Open Registry Editor to back up your Registry data first, and delete related files/folders including,
HKLM\SOFTWARE\Microsoft\Windows\CurrentVersion\App Paths\Reimage.exe
HKLM\SOFTWARE\Microsoft\Windows\CurrentVersion\Uninstall\Reimage Repair
HKLM\SOFTWARE\Microsoft\Windows NT\CurrentVersion\SystemRestore\Volatile
HKLM\SOFTWARE\Reimage
Delete all the matched found keys/entries/value, and reboot your computer after the cleanup. The manual uninstallation of Reimage Repair requires computer know-how and patience to accomplish. If you think the manual methods are overwhelming, you can contact support agents for help or use uninstaller to remove it automatically.
Option B: Uninstall Reimage Repair with an Uninstaller.
If you would like to save time and effort in locating and removing a bunch of files/folders manually, you should use Uninstallor to do the job. Uninstallor is a great tool which helps users uninstall different types of software effectively. In addition to software package, the service provides custom fix solution and on-demand remote support to ensure their users can uninstall any software they installed. This program is very easy to use. Simply follow the wizard.
Step 1: Install and open Uninstallor.
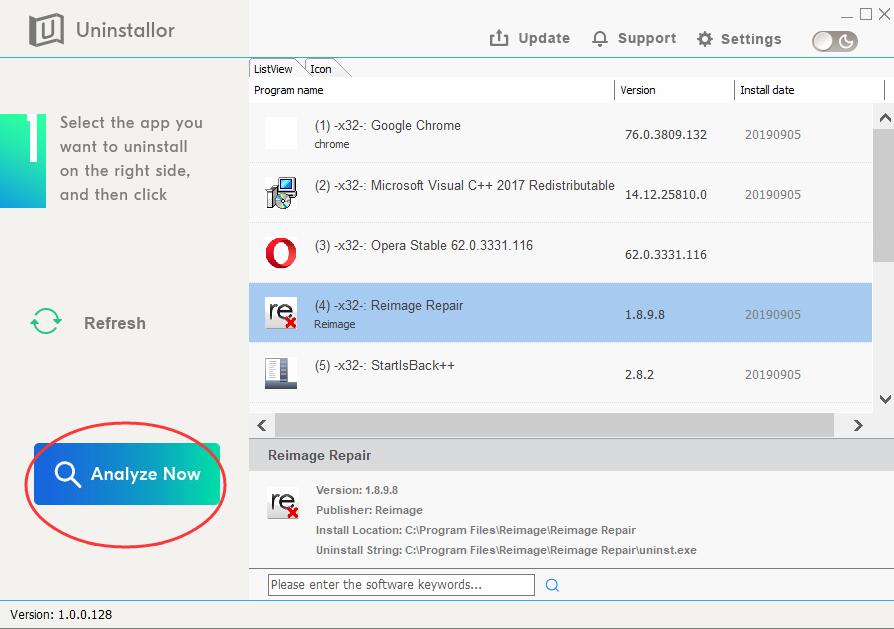
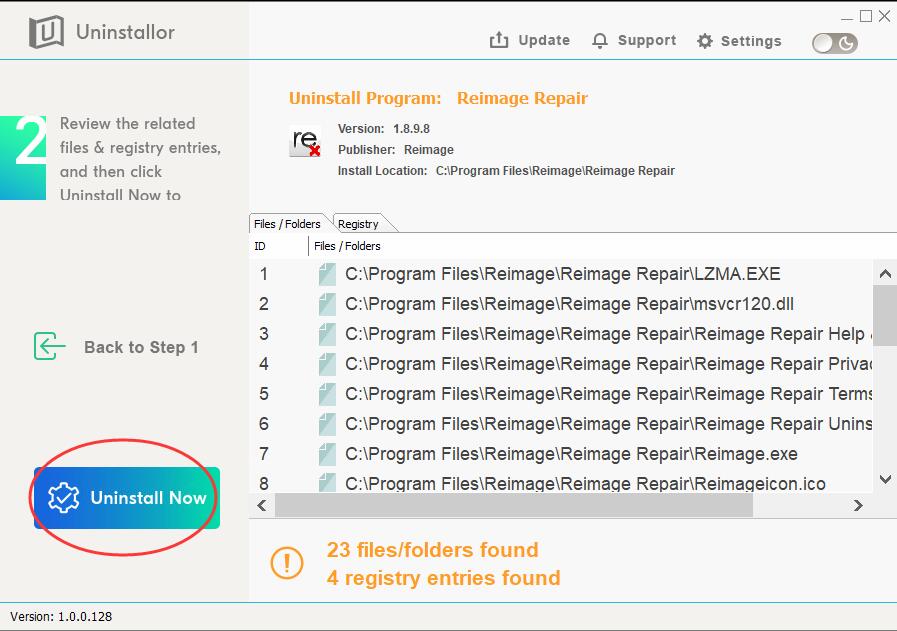
Step 2: Look for Reimage Repair and click Analyze Now.
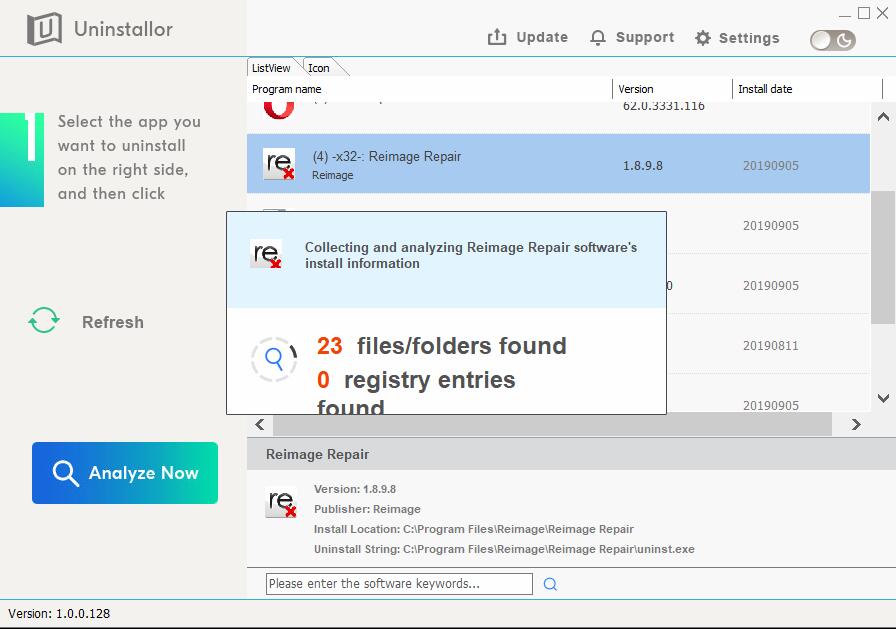
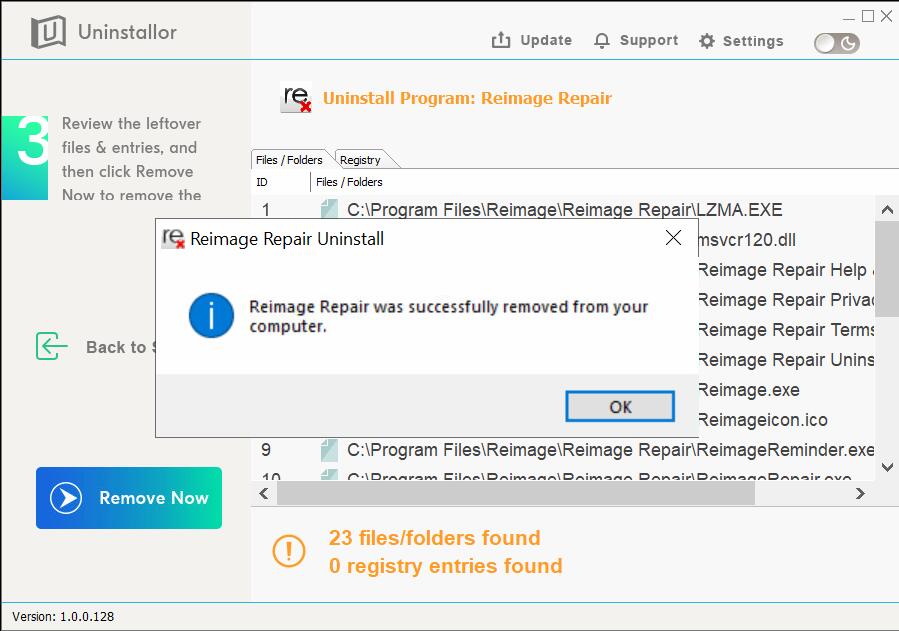
Step 3: Click Uninstall Now after it finishes analyzing and locating all files of Reimage Repair. Click Yes to confirm the uninstalling. The software and registry entries will be deleted once for all.