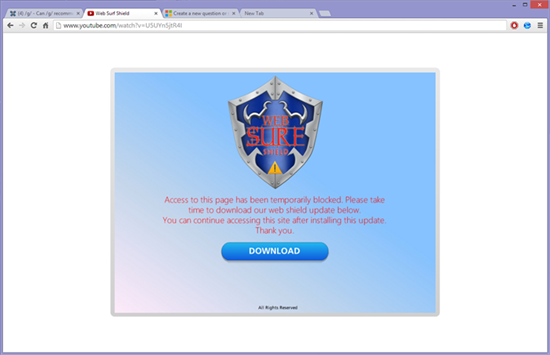
Web Surf Shield virus is hijacking virus, malicious software used by hijackers to disrupt Internet browsers, redirect default homepage, damage target computer operation, and even more gain access to gather confidential data for illegal profit. It can appear in the form of malicious code, scripts, third-party programs and browser plugin. When users have these plugins installed and enabled on computer, the Web Surf Shield virus can take the chances to compromise its target browser. Those high reputable Internet browsers like Internet Explorer, Mozilla Firefox, Google Chrome, or Safari on Mac OX S are all capable of being infected with Web Surf Shield virus with no exception. You may see the screenshot of the hijack virus as below.
Web Surf Shield virus is able to take over its target Internet browser by constantly exploiting vulnerability to degrade the overall security. Later after that, the hijack Web Surf Shield virus will focus on importing other Trojan virus/Ransomware or playing nasty deceptive trick to be convenient for the crucial goal of extortionist or sensitive information theft (you can see the your browser has been locked ransmoware removal tips here). Only when the victimized users get trapped in the deceptive trick will the hackers acquire their desired thing.
For example, once your computer is infected with the Web Surf Shield virus, all search things can be redirect to the Web Surf Shield virus page and you have to face a lot of pop-ups to coax you into paying. And on the virus page, it always reveals out the massage “The Surf Shield safeguards your online privacy and security. With one click, you’ll be surfing in stealth mode.” And it still demands you download and don’t fill in any online surveys to access the site you are willing. But the truth is that all those information are exploited by hacker and the solitary goal is to deceive money
Note: It is better to remove Web Surf Shield virus rather than leave it alone to do as its wants. You can ask VilmaTech 24/7 Online Experts for help if you hardly remove it by yourself.

Step A- Uninstall the Web Surf Shield from Windows
Step B- Check hosts file and proxy settings
Step C- Remove add-ons, cookies, and browsing history
Step D- Restore Internet browser settings
Step E- Remove Web Surf Shield virus files and registry entries
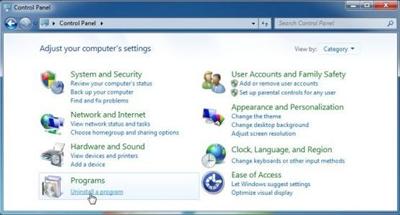
1. Click on the start button and click on Control Panel. If you are using Windows 8 you need move your mouse cursor or swipe to the exact lower left corner until the Desktop shortcuts menu appears, you then click on Control Panel.
2. In Control Panel page, click on Uninstall a Program. (If you are using Windows XP, you need click on Add/Remove Programs).
3. In the next window, you need scroll down and locate at Web Surf Shield malicious software. Later after that click on Uninstall/Change-> Continue->If it is necessary you still need type in the required admin password.
4. The next steps are nothing out of ordinary just a few of clicks by the setup wizard and you can be through. When it finishes, you close the window.
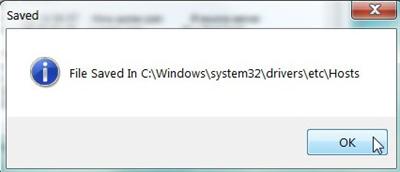
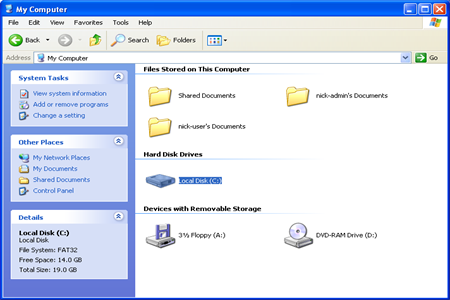
From this step you need check and repair hosts files. For Windows operating system (Window XP, Windows Vista, Windows 7 or Windows 8), go to C:\windows\system32\drivers\etc\.
1. Backup the hosts files first. Locate at the Hosts file, it is a file named “Hosts” with no extension. You can see the reference screenshot.
2. Right-click on it and select Copy. Now, right-click in the clear space to the right of the Hosts file and select paste.
3. Double click the hosts file and open it in a text editor. As seen below screenshot.
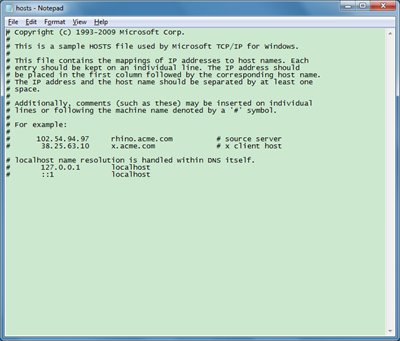
4. Delete additional lines and save the hosts file.
5. Check the proxy settings. Start the Internet Explorer, click on separately click Tools, Internet options, and then Connections. Click on LAN settings to open the LAN settings menu, ensure to uncheck the use a proxy server as your LAN.

1. Open the Internet Explorer
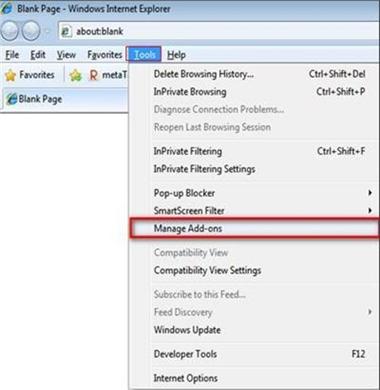
2. Click on Tools on the top of the page and click on Manage Add-ons.
3. In the Manage Add-on pop-up window, you need click on first option Toolbars and Extensions, and then remove all things that associated with Web Surf Shield virus.
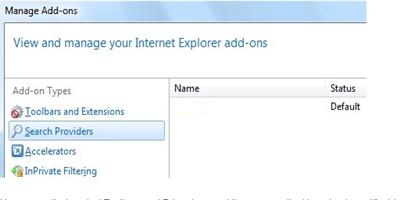
4. As seen picture mentioned above, click on Search Providers, then find the redirect site and remove it.
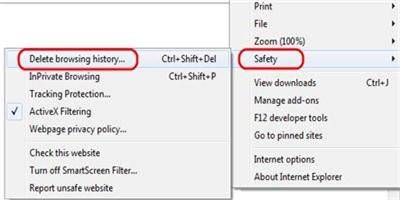
5. Come back Tools, you need select on Safety and then click delete browsing history.
6. To delete all cookies, uncheck the Preserve Favorite Website Data box, check the box next to Cookies, and hit Delete.
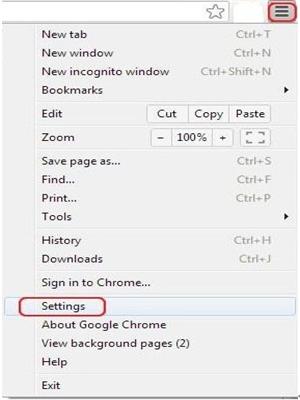
1. Open Google Chrome. Click the Chrome menu on the browser toolbar. Select Settings.
2. Click Show advanced settings.
3. In the “Privacy” section, click the Content settings button.
4. In the “Cookies” section, you can change the following cookies settings. Click all cookies and site data to open the Cookies and Other Data dialog.
![]()
5. o delete all cookies, click Remove all cookies at the bottom of the dialog.
6. Click the Chrome menu button on the browser toolbar, select Tools and then click on Extensions.
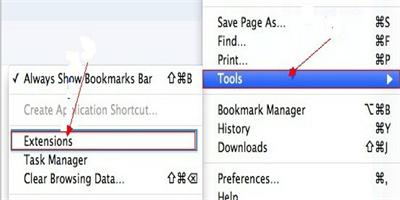
7. In the Extensions tab, remove the malicious Web Surf Shield toolbar or other useless toolbars by clicking on the Recycle Bin of the same row.
1. Open Firefox browser. Click on Tools, then Options, select Privacy.

2. Click “Remove individual cookies.”
3. In the Cookies panel, click on “Show Cookies.” Remove a single cookie click on the entry in the list and click on the “Remove Cookie button.”
4. To remove all cookies click on the “Remove All Cookies button.”
5. Click Tools and select Add-ons (Ctrl+ Shift+ A).
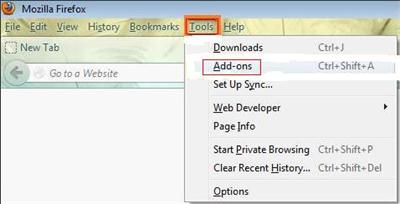
6. On the Extensions and Plugin tabs search for any suspicious add-ons about the Web Surf Shield virus and remove them.
7. Come back Tools again, this time you need click on “Clear Recent History” and you need clear all recent history.
Note: If you have troubles wit the steps above, you can chat with VilmaTech 24/7 Online Experts to consult more help now.
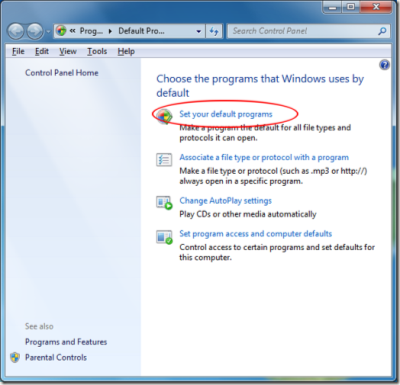
1. Click on the Start menu. Go to Control Panel and then click Network and Internet. Once in Internet Options page, click on the Programs tab, then select Set your default programs.
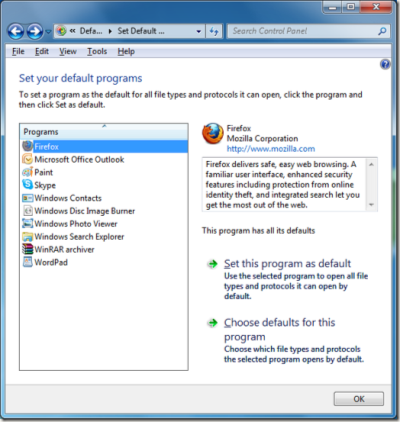
2. Locate the left programs bar, select Mozilla Firefox , then click Set this program as default. (If you want to set Internet Explorer or Google Chrome, you can select either of them).
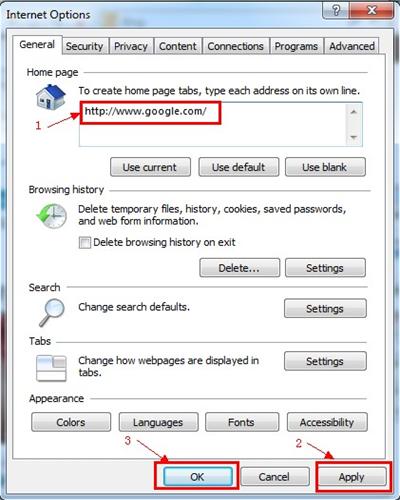
3. You then still need change homepage back from the Web Surf Shield virus. Come back Tools again on the Internet Explorer and then select Internet Options. Hit General tab in the menu and set the homepage to a preferred domain instead of Web Surf Shield.or choose Use default.
If you are on Mozilla Firefox, to set default homepage you need click on the Firefox button and select option. Click on General tab and choose Restore to Default. To reset default search engine back from the malicious site Web Surf Shield.: Click on the inverted triangle in the search bar; choose Manage Search Engines; locate any suspicious search engines; hit Remove and OK; click the inverted triangle again and select a preferred search provider as default search engine from the menu.

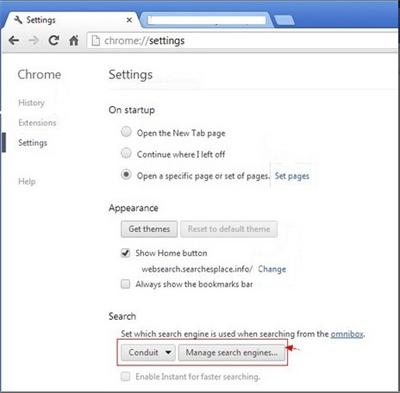
For Google Chrome, to reset default search engine you need click on Manage search engine and set a desired search engine as your default search engine. You can remove any unwanted and suspicious search engine from the list.
4. Restart the Internet Browser to apply all changes.
1. Access to the local disk to find out the Web Surf Shield virus files and delete them. You had better to show hidden files first so that you can remove all files. The Web Surf Shield virus files re referred as below.
%AllUsersProfile%\random.exe
%Appdata%\roaming\Microsoft\Windows\Templates\random.exe
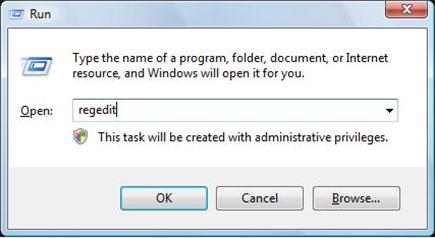
2. Delete the Web Surf Shield virus registry entries. Press Windows + R keys and enter regedit in Run window, click Ok.
3. In Registry Editor window, and delete related registry entries.
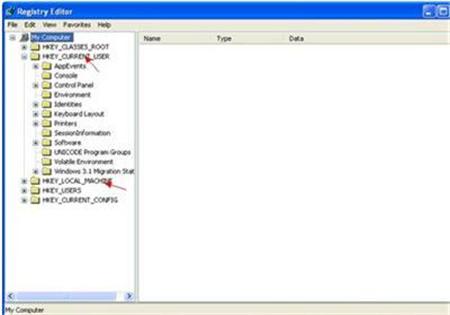
HKEY_CURRENT_USER\Software\Microsoft\Windows\CurrentVersion\Run “.exe”
HKEY_CURRENT_USER\Software\Microsoft\Windows\CurrentVersion\Policies\Explorer\run\
Web Surf Shield virus should be removed from the infected computer in case of further damages in soon future. Apart from degrading the PC performance including slowdown, breakdown, total system failure the hijack virus still can make the confidential data exposure taken place. The hijack Web Surf Shield virus still will let ransomware attack the infected computer and use their artificial traffic to boost affiliate payments or illegally acquire personal information. You may contact with VilmaTech 24/7 Online Support once you come across some troubles while you are tying to fix the Web Surf Shield virus as the steps mentioned above.